Creating Shared Dimension using Dimension Editor
1. In the Analysis Manager tree pane, expand the database in which you want to create the shared dimension.
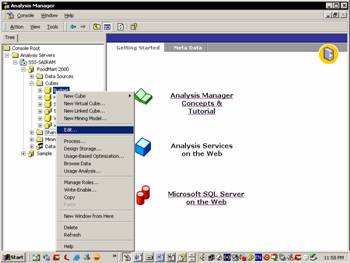
2. Right-click the Shared Dimensions folder, point to New Dimension, and then click Editor
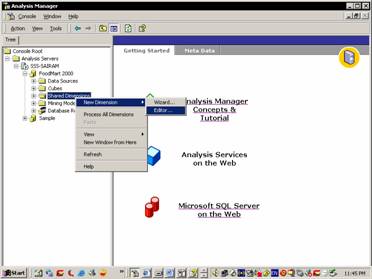 |
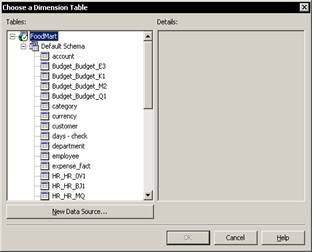
3. In the Choose a Dimension Table dialog box, expand a data source, click the dimension table for the dimension, and then click OK.
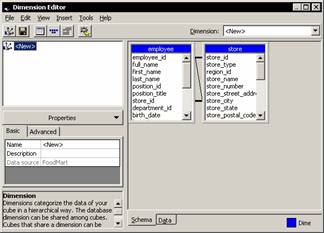
Dimension Editor appears with the dimension table showing in the Schema tab.
 |

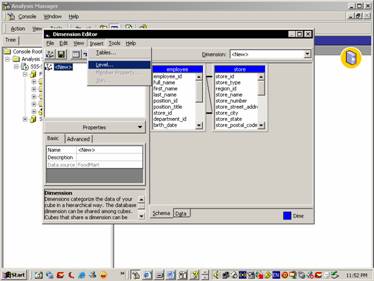
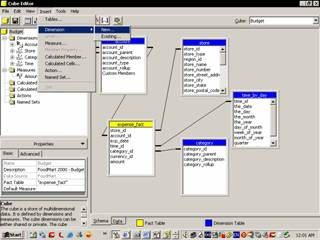
4. To add more tables to the dimension, on the Insert menu, click Tables, and then use the Select Table dialog box.
 |
5. If the dimension contains multiple tables, ensure each is joined to another. To join two columns, in the Schema tab, drag one column to the other.
6. Create levels in the dimension. It is easiest to create the highest, most general level first and then create progressively lower, more specific levels; otherwise, if member counting is enabled, a confirmation dialog box appears each time you add a level. For each level you want to create:
- On the Insert menu, click Level.
- In the Insert Level dialog box, select the column on which the level is based, and then click OK.
 |
As you create each level, it appears in the tree pane.
7. (Optional.) In the properties pane, modify the properties of the dimension and its levels.
 |
8. To save the dimension, on the File menu, click Save, type a name for the dimension in the New Dimension Name dialog box, and then click OK.
To browse a shared dimension
- In the Analysis Manager tree pane, right-click a shared dimension, and then click Browse Dimension Data. -or-
- In the Cube Editor tree pane, right-click a shared dimension, and then click Browse.
Creating Private Dimension using Dimension Editor
1. In the Analysis Manager tree pane, right-click the cube in which you want to create a private dimension, and then click Edit.
 |
2. In Cube Editor, on the Insert menu, point to Dimension, and then click New.
 |
3. In the Dimension Wizard, advance through the steps to define the private dimension
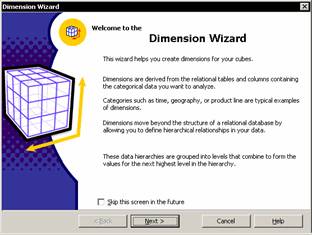 |
4. In the Finish step, to indicate the dimension is private, clear the Share this dimension with other cubes check box.
5. Click Finish.
6. Optional. In the properties pane, modify the properties of the dimension and its levels.
7. On the File menu, click Save.
How to browse a private dimension
In the Cube Editor tree pane, right-click a private dimension, and then click Browse.
Shared and Private Dimensions
Shared Dimension | Private Dimension |
| A shared dimension is a dimension that can be used by multiple cubes. | A private dimension is a dimension created for an individual cube. |
| In the Analysis Manager tree pane, shared dimensions appear in the Shared Dimensions folder under the database in which they are created. They also appear in the Cube Editor tree pane after they are included in the edited cube. | In Analysis Manager, private dimensions are found in the Cube Editor tree pane |
| In the tree panes, a shared dimension is identified by the following icon. | A private dimension is identified by the following icon. |
| Shared dimensions that share the same data source can be included in any cube or virtual cube in the database. By creating shared dimensions and using them in multiple cubes, the user can avoid the time-consuming alternative of creating duplicate private dimensions within each of the cubes. | Private dimensions can be included only for the cube or virtual cube for which it was created. The user has to create duplicate copies of private dimensions within each cube. |
| Shared dimensions also enable the standardization of business metrics among cubes. For example, standardized shared dimensions for time and geographic location ensure that data analyzed from different cubes will be similarly organized. This becomes very important when integrating data from different aspects of a business for analysis. | Private dimensions are exclusive and do not make for standardization of business metrics among cubes. |

