ASP.NET Adding Web Parts at Run Time
In this tutorial you will learn how to add Web Parts at run time and To test the Web Parts catalog.
To allow users to add Web Parts at run time
1. Open the Start.aspx page, and switch to Design view.
2. From the WebParts tab of the Toolbox, drag a CatalogZone control into the right column of the table, beneath the EditorZone control.
3. Both controls can be in the same table cell because they will not be displayed at the same time.
4. In the Properties pane, assign the string Add Web Parts to the HeaderText property of the CatalogZone control.
5. From the WebParts section of the Toolbox, drag a DeclarativeCatalogPart control into the content area of the CatalogZone control.
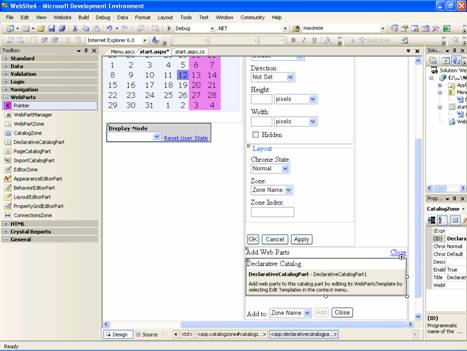
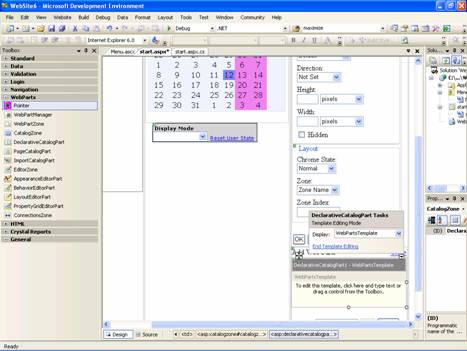
6. Click the arrow in the upper right corner of the DeclarativeCatalogPart control to expose its Tasks menu, and then select Edit Templates.
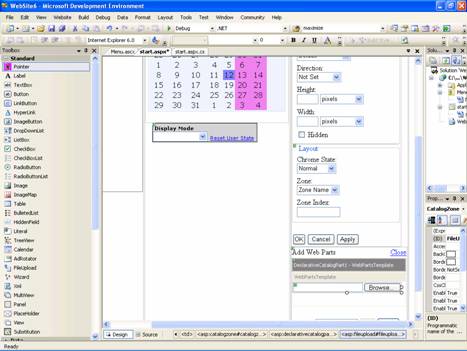
7. From the Standard section of the Toolbox, drag a FileUpload control and a Calendar control into the content area of the DeclarativeCatalogPart controls template.
8. Switch to Source view. Inspect the source code of the < asp:catalogzone > element. Notice that the DeclarativeCatalogPart control contains a < webpartstemplate > element with the two enclosed server controls that you will be able to add to your page from the catalog.
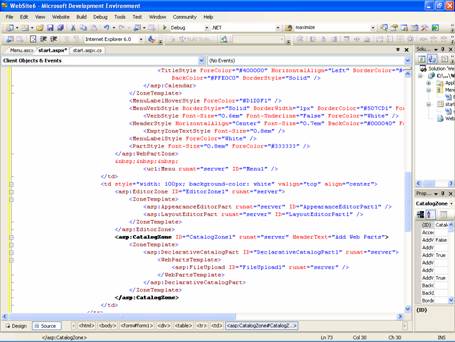
9. Add a Title property to each of the controls you added to the catalog, using the string value shown for each title in the code example below. Even though the title is not a property you can normally set on these two server controls at design time, when a user adds these controls to a WebPartZone zone from the catalog at run time, they are each wrapped with a GenericWebPart control. This enables them to act as Web Parts controls, so they will be able to display titles.
10. The code for the two controls contained in the DeclarativeCatalogPart control should look as follows.
Click here to veiw sample code
11. Save the page.
12. You can now test the catalog.
{mospagebreak}
.
.
To test the Web Parts catalog
……….1. Load the page in a browser.
……….2. Click the Display Mode drop-down menu, and select Catalog.
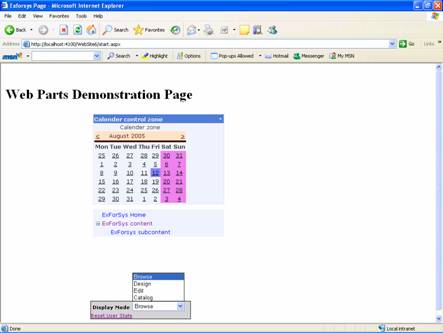
3. The catalog titled Add Web Parts is displayed.
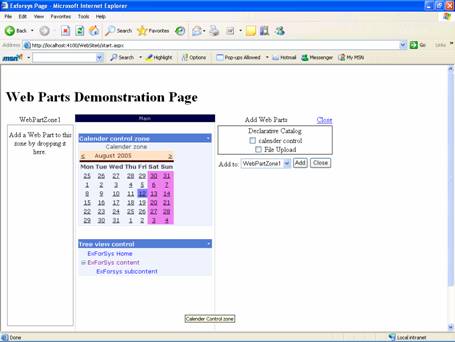
4. Drag the Tree view control from the Main zone back to the top of the Sidebar zone, and drop it there.
5. In the Add Web Parts catalog, select both check boxes, and then select Main from the drop-down list that contains the available zones.
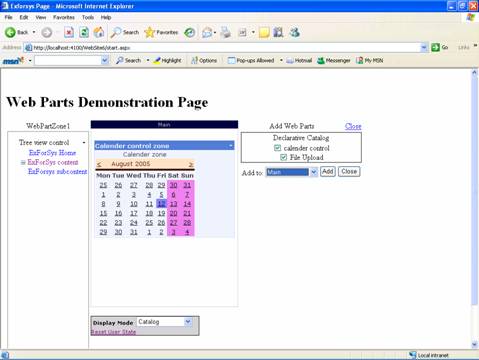
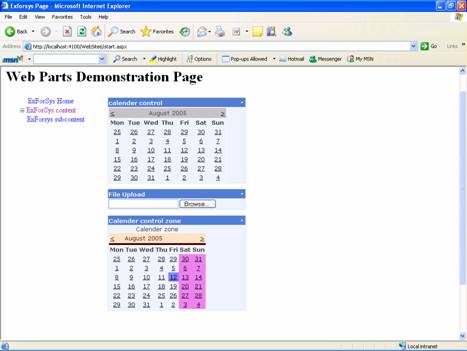
6. Click Add in the catalog. The controls are added to the Main zone. If you want, you can add multiple instances of controls from the catalog to your page.

7. Click the Display Mode drop-down menu, and select Browse. The catalog disappears and the page is refreshed.
[catlist id=179].