Creating an ASP.NET Application
In this tutorial you will learn how to Create an ASP.NET 2.0 Application, Examining the Interface, The Hello World Application, Designing Web Forms, The Embedded Web Server and Important folders in the ASP.NET 2.0 Applications.
Visual Studio.NET is a user friendly way to create web sites. It provides for multiple ways of opening websites. Frontpage Server extensions, FTP or direct file system path can be used to open the web pages. The inbuilt web server Cassini makes IIS server optional for testing and debugging of applications. ASP.NET 2.0 uses the dynamic compilation engine to compile its files and changes to .aspx, .cs or .vb files are caught immediately.
The copy website feature eases the process of copying websites from one location to a local or remote computer. Additionally double clicking on a .aspx file opens Visual Studio.NET 2005 and enables the editing of source code. The Intellisense is an intelligent tool that helps the developer view the pages in a browser or examine issues relating to data binding or page directives with ease.
Before actually creating a sample let us see what the interface has to offer to the web developer.
Examining the Interface
1. Open a new Web site by clicking File >New web site.
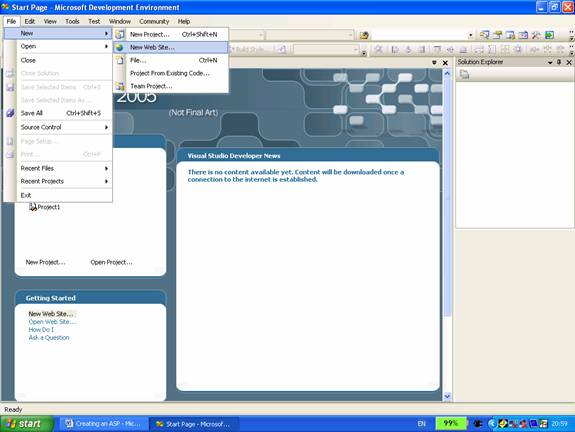
2. A new website project dialog box opens asking the user to pick out the type of website required. Select ASP.NET web site.
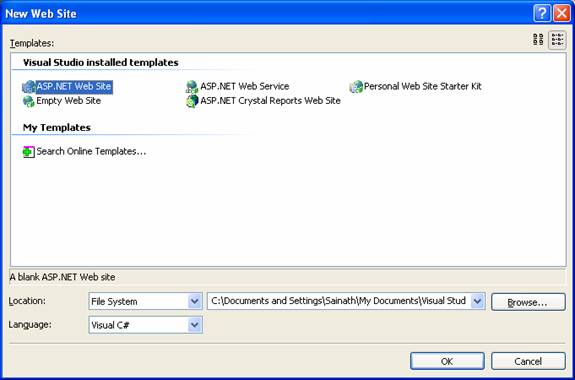
3. A minimum number of pages required for setting up a website are generated by Visual Studio.NET. A default .aspx file and an empty directory are created to help you start the project.
4. It must be pointed out that though ASP.NET 2.0 creates a project file it does not track the files that form a part of the application. The root directly implicitly defines the web project. A new file can be added to the project by copying a file onto the project or right clicking the solution explorer and adding a file to it.
5. Also note that the above dialog box allows the developer to specify the location of the project and the language of choice.
6. A web page can be edited by navigating to the Design, source or the sever code views. The Design view displays a HTML layout. It lets the user select controls or static elements and edit them. The user has a graphical preview of what his web page will look like. The source view displays the HTML markup with the inline code. IntelliSense tips, autocompletion and colored syntax help the developer in multitude of ways. The server code view displays only the inline code with the colored syntax.
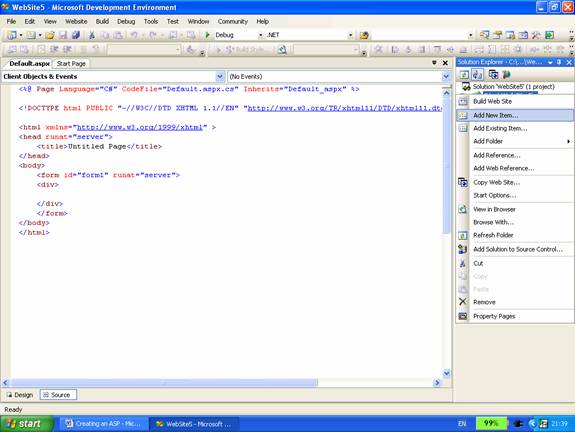
7. The user can chose the kind of template he wants to add to his application. To select a template right click on the root of the project and click on Add New item…
8. A number of different types of templates are displayed for the selection of the developer.

9. Two check boxes at the bottom of the page allow the separation of the code and the selection of a master page. The restructured code-behind schema of Visual Studio 2005 supports separation of code but makes it optional. The file is automatically named as default1 or default2 .aspx and so on. The language selected for the project is displayed in the language box. However, the user is free to select different languages for different pages.
The Hello World Application
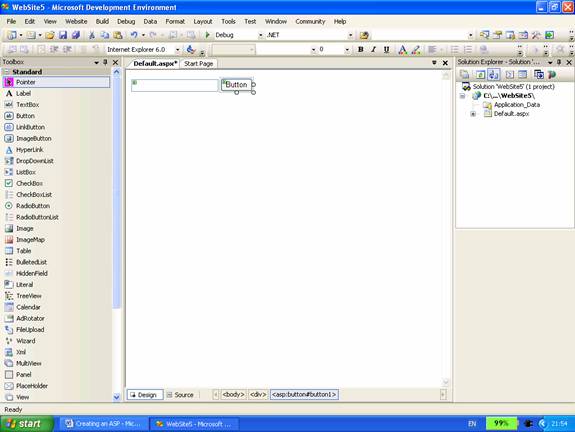
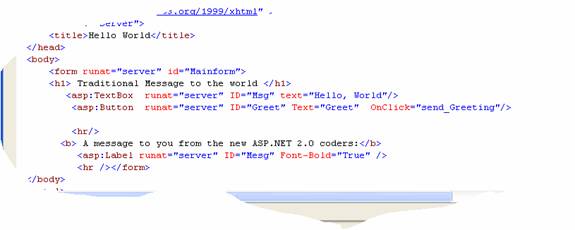
In the manner of the traditionalists let us create the Hello world application. Let us select a web form and place a textbox and a button.
Enter the following code in the source view of the Default.aspx page.
Click here to view sample code
<%@ PageLanguage="C#"CodeFile="Default.aspx.cs"Inherits="Default_aspx"%>
Now rename the page as greetings.aspx by right clicking on the page in solutions Explorer and changing its name. We shall now execute the code by clicking on control + F5 or right clicking on the file in the Solution Explorer and selecting View in Browser. The page appears as under.
{mospagebreak}
.
.
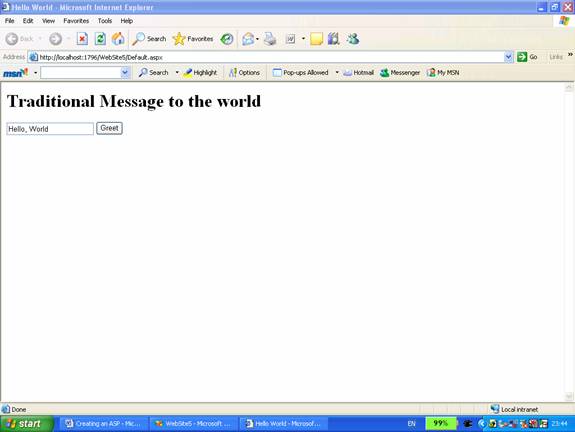
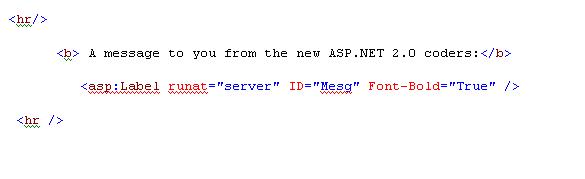
In the above code nothing happens when we click on the “Greet” button. Let us write some code to make it do something. Add the following code between the form tags just below the code entered above:
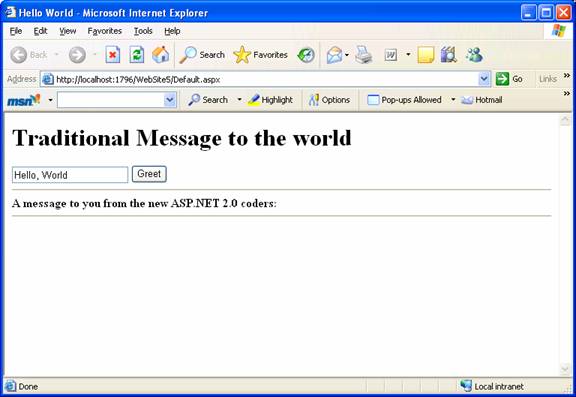
The output appears as under:
Designing Web Forms
As noted in the above exercise it is easy to drag and drop controls directly from the toolbox into the form and the corresponding HTML can also be seen in the source view. The code for a specific control can be edited by highlighting it in the design view and navigating to the source view. Switching between the views also does not undo the editing of the HTML code.
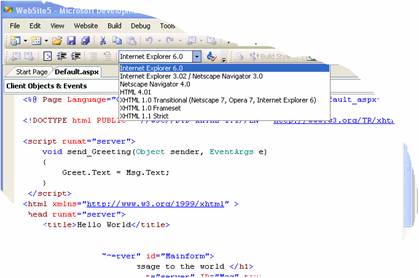
The autocompletion feature kicks in the moment the developer enters a tag and ensures that the start and end tags are not forgotten by the user. Moving the cursor over a start tag highlights the corresponding end tag for the user. The HTML also is monitored for suitability to the browser which is targeted. The target browser is displayed at the top of the edit window. By default it is set to Internet Explorer 6.0. When a user types a wrong or deformed tag the incompatibility is immediately indicated. The client targets cover a wide gamut–Netscape navigator, mobile schemas, XHTML, transitional schema etc.
Note that in the above application when a button was placed on the form, the HTML code was modified to contain an additional onClick attribute
However this new version does not automatically provide the code for event write up. Event binding has to be done by the developer.
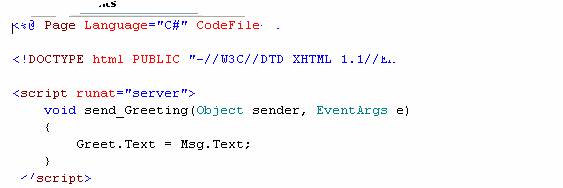
When the page is compiled for the first time the event is dynamically bound and the onclick attribute is expanded to the code displayed above. Note that instead of placing it in a separate file the code is defined as an event handler in the code-behind class.
Visual Studio.Net demands a web.config file as soon as an attempt is made to run the file, if it has not been generated. User’s have the option of ignoring the demand and clicking run or permitting the creation of the file. When the developer wants to debug the code by creating his own web.config file, he will have to define it. To make Visual Studio.NET 2005 generate the web.config add the following code.
< compilation debug= “true” / >
The debugging session can now begin.
The Embedded Web Server:
As mentioned in the earlier sections, Visual Studio.NET comes with an embedded server. This server does not have the features of the IIS but can run individual pages with ease. It does not have a metabase. It does not have an Simple Mail Transfer Protocol (SMTP) interface to enable it send emails, but this can be overcome by installing a separate SMTP service. In the context of security, the web server takes a token of the currently logged in user and executes the application. However, this makes for a testing environment that is significantly different from the real life scenario. Applications that work well in the local web server may fail when tested in the IIS. Therefore, it is recommended that though the local web server may be used for creating the pages, the ultimate tests should be conducted with the IIS>
Important folders in the ASP.NET 2.0 Applications
Folder names are case sensitive in ASP.NET 2.0. Data and Image folders do not play a significant role in the runtime architecture. Yet other folders like Bin, Code, Resources and themes are very important. The Bin folder contains all the precompiled assemblies that the application needs. The Code folder contains source class files that the ASP.NET runtime engine dynamically compiles to assemblies. The Resources folder contains resource files that are required for compiling the assemblies. The Themes folder defines the themes that are supported by the application. They are dynamically compiled to a dynamic assembly.
This section of the tutorial has introduced the basic concepts of the ASP.NET application and also examined how the traditional ‘Hello World’ application can be created using the interface available. In the next few sections of this tutorial we shall be examining the other significant features of ASP.NET and also learning how to use them in application design.
[catlist id=179].