In this tutorial you will learn how to use the options in SQL*Loader for generating Bad File, SQL*Loader Rejects, Oracle Database Rejects, Discard File, Log File and Logging Information.
Consider a scenario where you have a data file with city, states and zip codes. You are interested in loading data only for one particular state and reject any record which does not have a zip code. Such records which you are not interested can be in the discard file.
SQL*Loader rejects records with missing quotes and Oracle database rejects records when a piece of information is missing but is required as per the table definition or constraints, such records will be written to the bad file.
In order to skip the records using discard file option, you will need to enter the criteria in the control file which I will discuss as part of an example walkthrough.
SQL*Loader creates the log file at the specified location or working directory where you are running the process with details about the load along with execution steps, records counts and any error messages.
Working with Discard and Bad files using Command prompt
Let me get walk you through with a simple example to see how we can put these options together.
Create a table called zipcode to start with
CREATE TABLE "EXFORSYS"."ZIPCODE"<br />
("ZIPCODE" NUMBER(5,0) NOT NULL ENABLE,<br />
"CITY" VARCHAR2(20 BYTE),<br />
"STATE" VARCHAR2(2 BYTE),<br />
CONSTRAINT "ZIPCODE_PK"<br />
PRIMARY KEY ("ZIPCODE"));
Sample data – copy and save the the text file as zipcode.dat
MA,1138,Springfield<br />
MA,1139,Springfield<br />
MA,1144,Springfield<br />
MA,1151,Indian Orchard<br />
MA,1152,Springfield<br />
MA,1199,Springfield<br />
NJ,7670,Tenafly<br />
NJ,7675,Westwood<br />
NJ,7676,Ho-Ho-Kus<br />
NJ,7677,Woodcliff Lake<br />
NJ,7688,Teaneck<br />
NJ,7701,Red Bank<br />
NJ,7702,Shrewsbury<br />
NY,10174,NEW York<br />
NY,10175,NEW York<br />
NY,10176,NEW York<br />
NY,10177,NEW York<br />
NY,10178,NEW York<br />
NY,10179,NEW York<br />
NY,10184,NEW York<br />
NY,,NEW York<br />
,10186,NEW York<br />
,10187,NEW York <br />
,10188,NEW York
Here is the control file we are going to use to load the data. Copy and save the file as zipcode.ctl
LOAD DATA INFILE 'ZIPCODE.DAT'<br />
BADFILE 'ZIPCODE.BAD'<br />
DISCARDFILE 'ZIPCODE.DIS'<br />
INSERT INTO TABLE ZIPCODE<br />
WHEN STATE = 'NY'<br />
FIELDS TERMINATED BY ','<br />
(STATE, ZIPCODE,CITY)
INFILE ‘ZIPCODE.DAT’ – This is the input file name
BADFILE ‘ZIPCODE.BAD’ – This is the rejected or bad records file
DISCARDFILE ‘ZIPCODE.DIS’ – This is the discard file where the condition is not matching. We are looking to load only New York state data.
INSERT INTO TABLE ZIPCODE – There are few options you can use , INSERT/APPEND/REPLACE.
FIELDS TERMINATED BY ‘,’ – Fields are terminated by comma in the data file
(STATE, ZIPCODE,CITY) – Column names
To load from command prompt:
Change to the directory where you have saved zipcode.dat and zipcode.ctl files.
Run the following command.
SQLLDR USERNAME/PASSWORD@SERVICENAME CONTROL=CONTROLFILENAME

Here is the data from zipcode table. As per the condition “WHEN STATE = ‘NY’”, we are interested to load only the NY records.

Now, take a look for the ZIPCODE.LOG log file in working directory where you have run the process.
Table ZIPCODE:
7 Rows successfully loaded.
1 Row not loaded due to data errors.
16 Rows not loaded because all WHEN clauses were failed.
0 Rows not loaded because all fields were null.
Record 21: Rejected – Error on table ZIPCODE, column ZIPCODE.
NY,,New York – This is the record 21 in the sample data, ZIPCODE value is not there and it’s required as per our table definition “"ZIPCODE" NUMBER(5,0) NOT NULL”.
Rest of the records are not matching condition “WHEN STATE = ‘NY’“. In few cases, STATE value is not present.
Record 1: Discarded - failed ALL WHEN clauses. <br />
Record 2: Discarded - failed ALL WHEN clauses. <br />
Record 3: Discarded - failed ALL WHEN clauses. <br />
Record 4: Discarded - failed ALL WHEN clauses. <br />
Record 5: Discarded - failed ALL WHEN clauses. <br />
Record 6: Discarded - failed ALL WHEN clauses. <br />
Record 7: Discarded - failed ALL WHEN clauses. <br />
Record 8: Discarded - failed ALL WHEN clauses. <br />
Record 9: Discarded - failed ALL WHEN clauses. <br />
Record 10: Discarded - failed ALL WHEN clauses. <br />
Record 11: Discarded - failed ALL WHEN clauses.<br />
Record 12: Discarded - failed ALL WHEN clauses.<br />
Record 13: Discarded - failed ALL WHEN clauses. <br />
Record 22: Discarded - failed ALL WHEN clauses. <br />
Record 23: Discarded - failed ALL WHEN clauses. <br />
Record 24: Discarded - failed ALL WHEN clauses.
Let’s take a look at the discard and rejected files. As per the log file, there should be 16 discarded records and 1 bad record.
File contents of bad record file – ‘ZIPCODE.BAD’
NY,,NEW York
File contents of discard file – ‘ZIPCODE.DIS’
MA,1138,Springfield <br />
MA,1139,Springfield <br />
MA,1144,Springfield <br />
MA,1151,Indian Orchard <br />
MA,1152,Springfield <br />
MA,1199,Springfield <br />
NJ,7670,Tenafly <br />
NJ,7675,Westwood <br />
NJ,7676,Ho-Ho-Kus <br />
NJ,7677,Woodcliff Lake <br />
NJ,7688,Teaneck <br />
NJ,7701,Red Bank <br />
NJ,7702,Shrewsbury <br />
,10186,NEW York <br />
,10187,NEW York <br />
,10188,NEW York


Working with Discard and Bad files using OEM
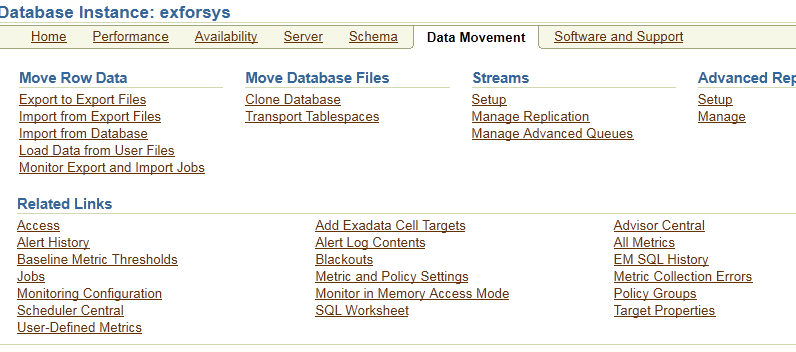
Login in to OEM, Select “Load Data from User Files” from the “Data Movement” menu.
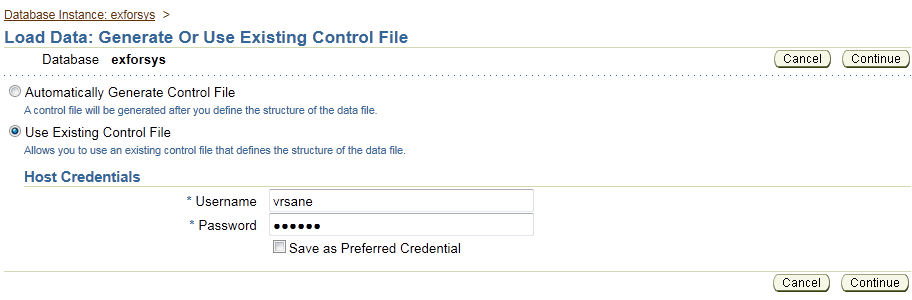
Select “Use Existing Control File” and click on Continue
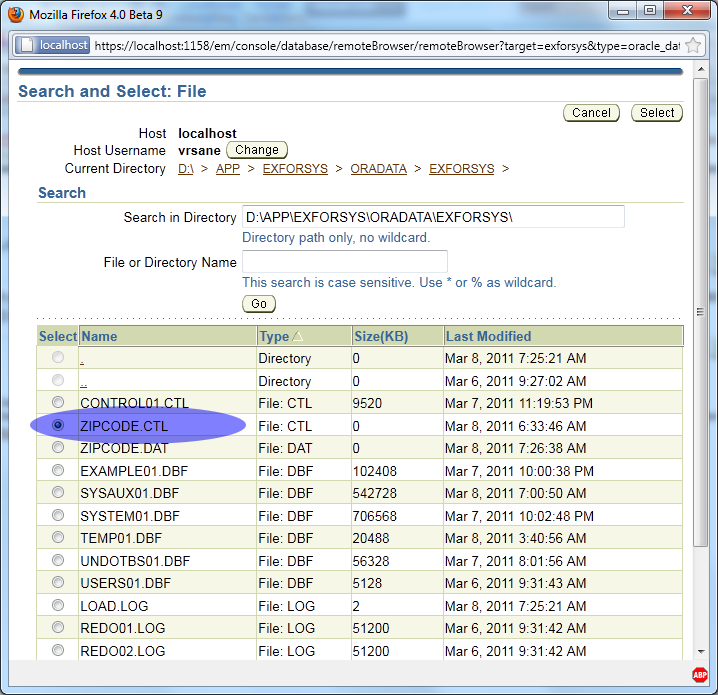
You will see a new window, select the control file. In our example, zipcode.ctl
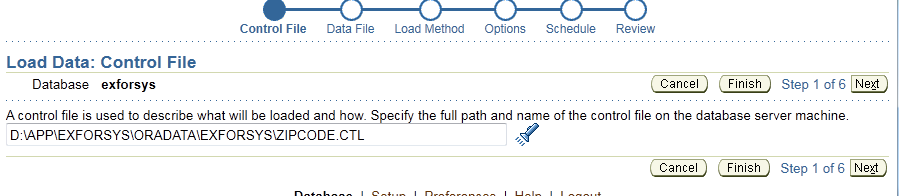
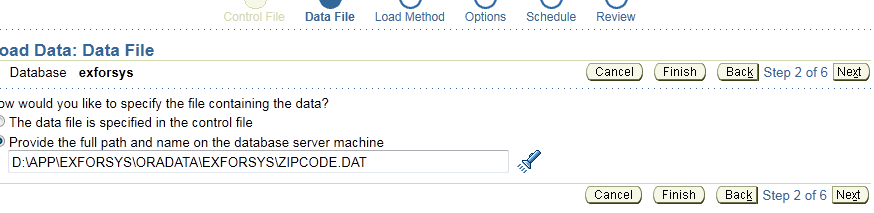
Click next and select the data file you would like to use
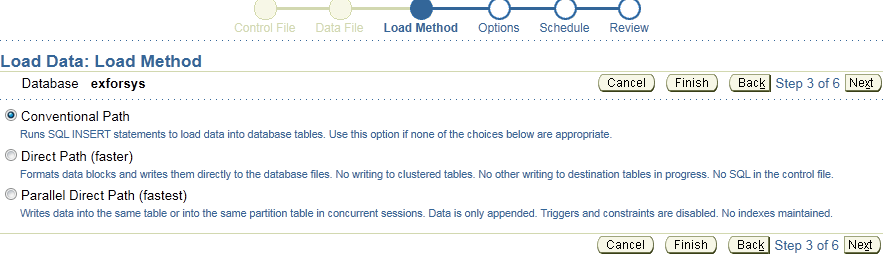
We are going to use the “Conventional Path” load method.
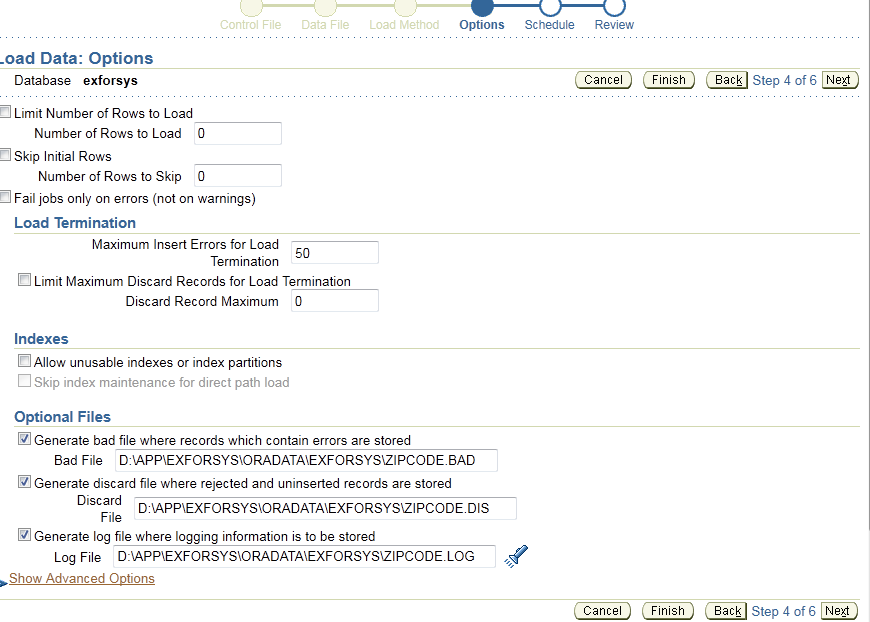
The next screen will prompt for several options as shown below. For practice purpose, we are going to fill the options for bad, discard and log file parameters with where you would like those files to be created.
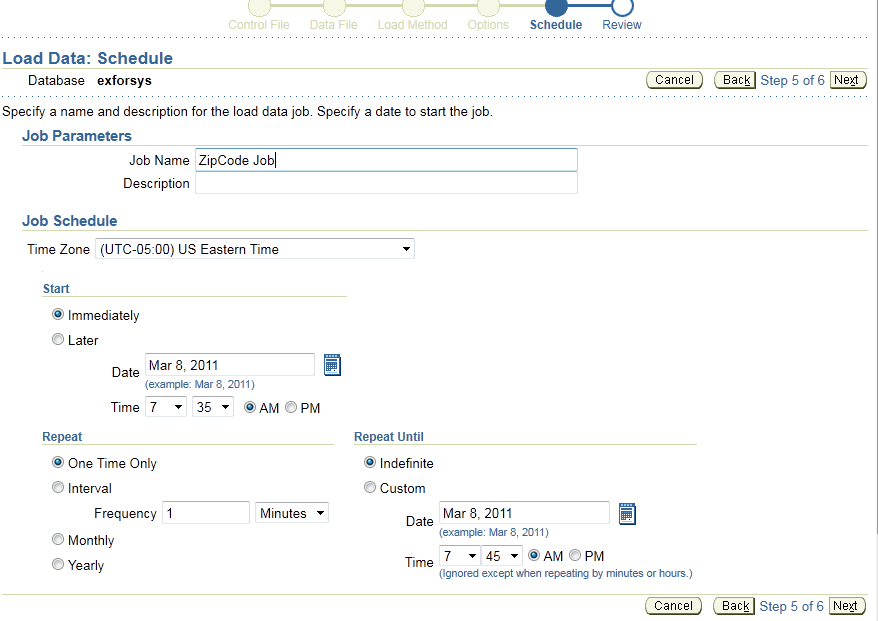
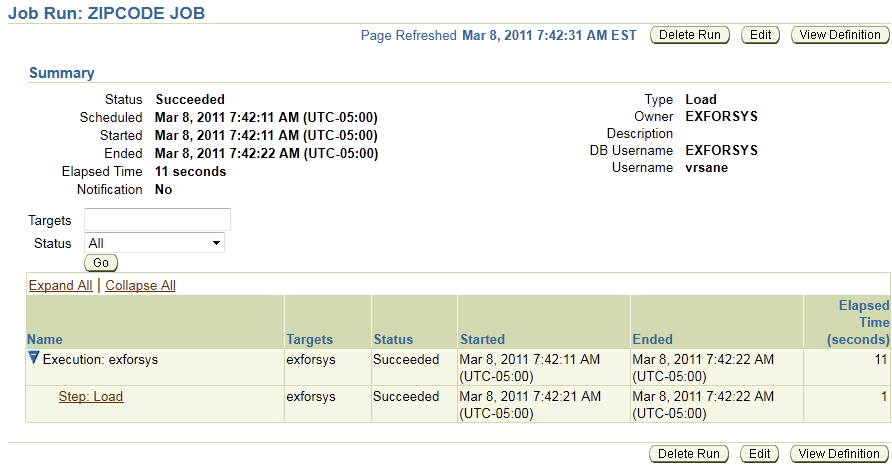
After filling up the Job Parameters, you can also set other Job Schedule options such as starting time and job repeat. We will be just submitting the job immediately.
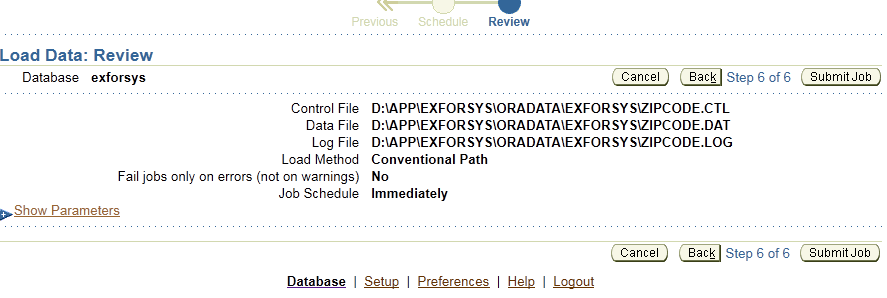
Here is the summary of the job along with the parameters and control file locations that we have entered.

Finally, let us verify the data now as shown in screen below
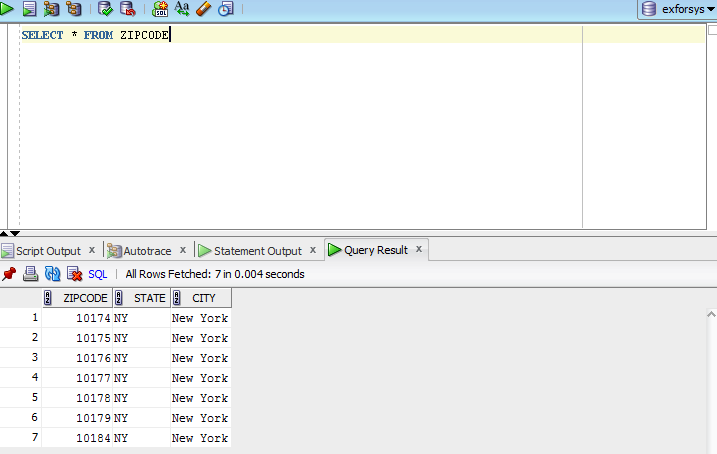
You can see the records (7 Rows are fetched) list in the Query Result section.
There are several other advanced options based on the amount of data and the format of the input files. Hope this article has provided you the basic knowledge to get started with SQL*Loader. Once you get the basic idea of how SQL*Loader works, I would recommend that you read the Oracle product documentation based on the version you will be using.
[catlist id=177].