Adding Sorting and Paging in GridView
In this tutorial you will learn adding sorting and paging in a GridView Control, Implement Two Column Sorting, Create Code for Custom Sorting, Editing the GridView control data, Deleting Displayed Records, Inserting Records and Using Templates.
Adding Sorting and Paging
Sorting and paging can be added to the GridView control without writing any code.
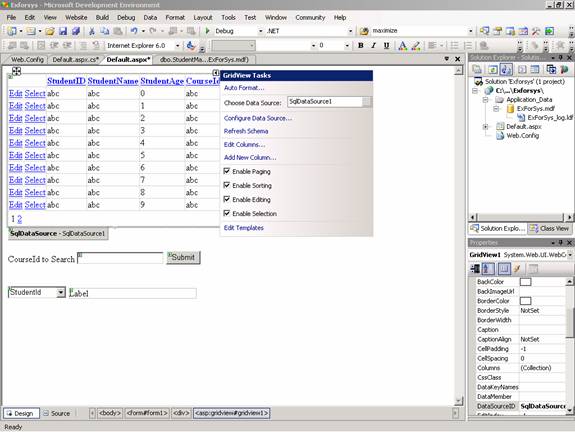
1. In Design view, right-click the GridView control, and then click Show Smart Tag.
2. On the GridView Tasks menu, select the Enable Sorting box.
3. The column headings in the GridView control change to links.
4. On the GridView Tasks menu, select the Enable Paging box.
5. A footer is added to the GridView control with page number links.
6. Optionally, use the Properties window to change the value of the PageSize property from 10 to a smaller page size.
7. Press CTRL+F5 to run the page.
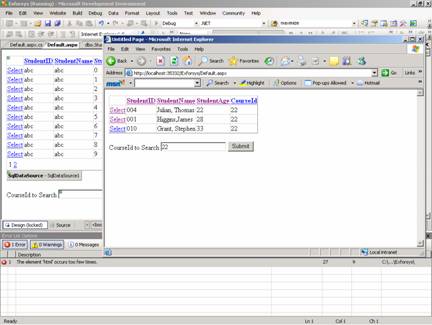
8. The GridView control is displayed with StudentID, StudentName, StudentAge and CourseId columns. The column headings can be clicked to sort by the contents of that column.
9. Close the browser.
Implementing Two Column Sorting
At this point, the contents of the table can be sorted on the basis of a single column. However, there may be situations where the developer needs to provide an interface to sort data on the basis of two or more columns. To implement two-column sorting, custom sorting features may be added. In this section, let us add a DropDownList control to specify a second column to sort the grid. The DropDownList control will display the names of columns from the StudentMaster table that users can sort by.
1. In the Default.aspx page, switch to Design view.
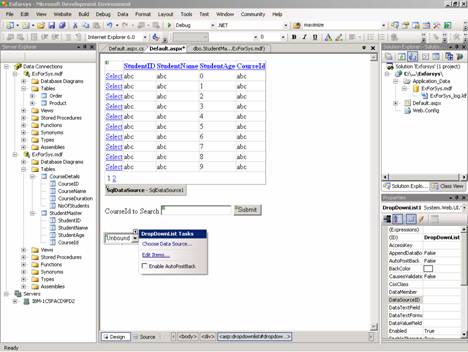
2. In the Toolbox, from the Standard group, drag a DropDownList control onto the page.
3. Right-click the DropDownList control, click Show Smart Tag, and then on the Common DropDownList Tasks menu, click Edit Items.
4. In the ListItem Collection Editor dialog box, click Add, and set Text and Value to StudentName.
5. Click Add to add another list item, and then set Text and Value to CourseId.
6. Click Add, and then set Text and Value to StudentAge.
7. Click Add, and then set Text and Value to StudentId.
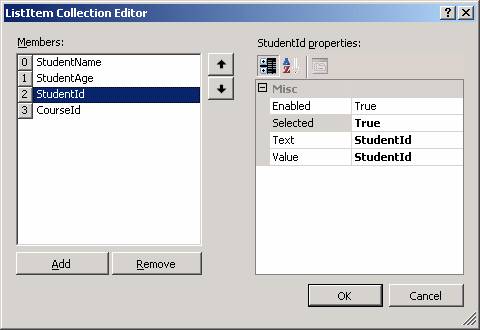
8. Set Selected to True.
9. Click OK.
10. On the Common DropDownList Tasks menu, select the Enable AutoPostBack box.

11. In the Toolbox, from the Standard group, drag a Label control onto the page.
12. Right-click the Label control, click Properties, and then set ID to LabelSortDisplay.
Creating Code for Custom Sorting
For custom sorting, we now write an event handler for the GridView control’s Sorting event. The Sorting event is raised when the user clicks a column heading in the GridView control.
{mospagebreak title=ASP.NET 2.0 – Event handler for Sorting Event}
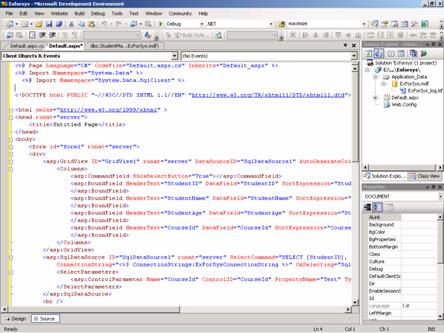
To add an event handler for the Sorting event 1. If you are working with a single-file page, switch to Source view and then add the following directives to the top of the code page:
< % @ Import Namespace="System.Data" % >
< % @ Import Namespace="System.Data.SqlClient" % >
2. Importing the namespaces will make it easier to write the code needed.
3. If the application is using a code-behind page, switch to the code-behind page Default.aspx.cs and add the following lines to the top of the code file, outside the class declaration:
using System.Data;
using System.Data.SqlClient;
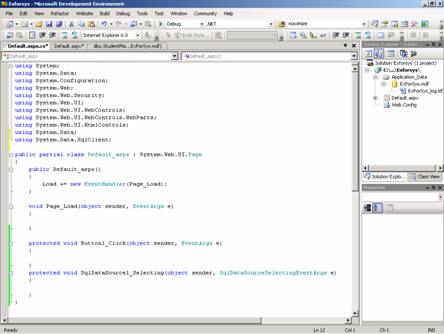
4. In the Default.aspx page, switch to Design view, right-click the DropDownList control, and then click Properties.
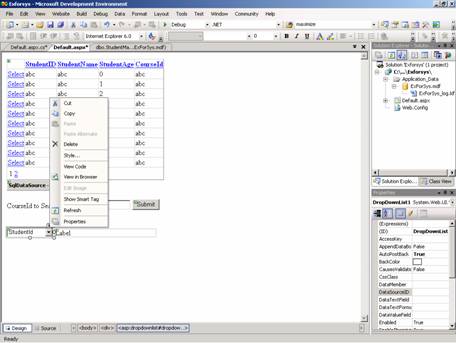
5. In the Properties window toolbar, click the Events icon, and then double-click SelectedIndexChanged to create a skeleton event handler.
6. Insert the following highlighted code into the event handler.
Click here to view sample code
This code intercepts the SelectedIndexChanged event for DropDownList1 to specify the second sort parameter based on the value selected. Then, it retrieves the sortorder from the Session state and adds the " ASC" or " DESC" to the Sort property for the DataView. Finally, it rebinds the GridView control to the data.
7. Switch to the Default.aspx page and select the DropDownList control.
8. In the Properties window toolbar, click the Events icon, and then double-click Load to create a skeleton event handler.
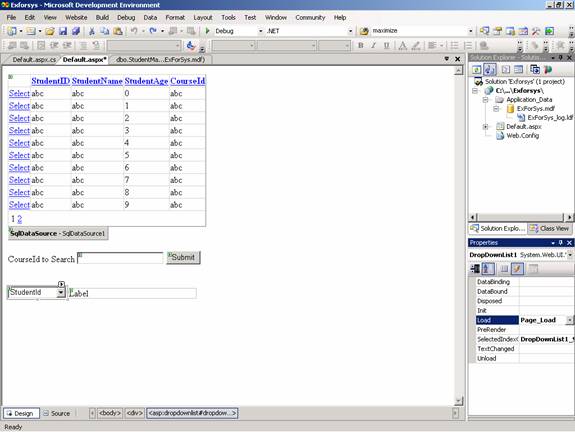
9. Insert the following highlighted code into the Page_ Load event handler.
Click here to view sample code
10. This code handles the Page Load event and retrieves the ConnectionString connection string from the Web.config file to execute a SELECT statement using a sqlDataAdapter control. Then, it fills a dataset with the data returned, selects the first table of the dataset as a DataView object, for sort operations, and then saves the DataView object in the Session state such that subsequent sorts do not require a round trip to the database. Finally, it sets the default sort order to Ascending in Session state.
11. Switch to Design view.
12. Right-click the GridView1 control, click Properties, and then set DataSourceID to (None) to remove it.
13. Because you are setting the data source in code, the GridView control cannot also have a DataSourceID property setting.
14. When prompted to refresh the fields and keys for the GridView control, click No.
15. Although you are changing the data source for the GridView control (by removing it), you want to retain the existing field bindings.
16. Right-click the GridView1 control, and then click Properties.
17. In Properties, click Events, and then double-click Sorting to create a skeleton event handler.
18. Add the following highlighted code to the Sorting event handler:
Click here to view sample code
This code handles the sorting event of the GridView control to customize the sort functionality of the GridView control. It uses the sorting functionality of the underlying DataView control. It retrieves the DataView control saved in the Session state. Then, it retrieves the sort order value from Session state and adds " ASC" or " DESC" to theSortExpression property passed to the event handler. It saves the new sort order and the SortExpression value in the Session state. Finally, it displays the SortExpression value in a Label control and rebinds the GridView control to the data. The page can now be tested.
2. The GridView control is displayed with StudentId, StudentName, StudentAge, and CourseId columns. Click a column heading to sort by the contents of that column.
Editing the GridView Control Data
The GridView control already contains all the functions necessary for editing data, since the control is abstract and generic. In fact this is the greatest strength of the GridView control over the DataGrid control.
The GridView control uses the assigned data source to edit the data records and the developer will have to add an additional query to the SqlDataSource control for updation of data. The code would be something like the one illustrated below.
updateCommand="UPDATE StudentMaster SET StudentName=@StudentName, StudentAge=@StudentAge WHERE(StudentMaster.StudentID=@StudentId)"
When the AutoGenerateEditButton property is set to true, the GridView displays an additional column. When update is clicked the GridView searches for an appropriate command object on the underlying data source. It fires the rowUpdating event and checks the CanUpdate property of the data source.
Deleting Displayed Records
Deleting records is similar to updating and Editing. The GridView rides on the data source’s ability to perform data operations. The record deletion is enabled by specifying the AutoGenerateDeleteButton to True. The GridView then renders a column of Delete buttons for each row on the GridView. The data source method is passed as a dictionary key filed name/value pair to uniquely identify the row to delete. However, the GridView does not provide any feedback on the operation.
Inserting Records
GridView does not support inserting data against a data source object.
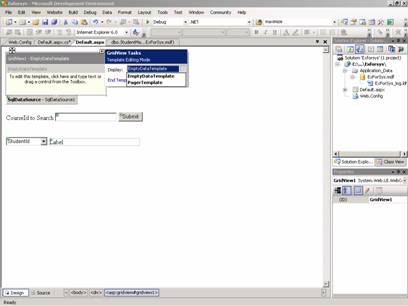
Using Templates
Individual templates can be defined for each field.

Assigning data binding to a control within a template is easy. Besides individually created fields, the GridView control offers two integrated Templates, PageTemplate and NullTemplate. The latter is useful when an assigned data source returns an empty list of data records. A message can be flashed to the user if an empty record set is returned.
The GridView indeed comes with a lot of goodies. Developers are freed from the large volume of code that had to be written. Though the look and feel of the GridView is similar to the DataGrid, it is really very different.
In the next section we shall examine the DetailsView which is a complementary to the GridView in several ways.
{mospagebreak title=ASP.NET 2.0 – GridView Control Data}
To test the page 1. Switch to Open the Default.aspx page, and then press CTRL+F5 to run the page.
2. The GridView control is displayed with StudentId, StudentName, StudentAge, and CourseId columns. Click a column heading to sort by the contents of that column.
Editing the GridView Control Data
The GridView control already contains all the functions necessary for editing data, since the control is abstract and generic. In fact this is the greatest strength of the GridView control over the DataGrid control.
The GridView control uses the assigned data source to edit the data records and the developer will have to add an additional query to the SqlDataSource control for updation of data. The code would be something like the one illustrated below.
updateCommand="UPDATE StudentMaster SET StudentName=@StudentName, StudentAge=@StudentAge WHERE(StudentMaster.StudentID=@StudentId)"
When the AutoGenerateEditButton property is set to true, the GridView displays an additional column. When update is clicked the GridView searches for an appropriate command object on the underlying data source. It fires the rowUpdating event and checks the CanUpdate property of the data source.
Deleting Displayed Records
Deleting records is similar to updating and Editing. The GridView rides on the data source’s ability to perform data operations. The record deletion is enabled by specifying the AutoGenerateDeleteButton to True. The GridView then renders a column of Delete buttons for each row on the GridView. The data source method is passed as a dictionary key filed name/value pair to uniquely identify the row to delete. However, the GridView does not provide any feedback on the operation.
Inserting Records
GridView does not support inserting data against a data source object.
Using Templates
Individual templates can be defined for each field.
Assigning data binding to a control within a template is easy. Besides individually created fields, the GridView control offers two integrated Templates, PageTemplate and NullTemplate. The latter is useful when an assigned data source returns an empty list of data records. A message can be flashed to the user if an empty record set is returned.
The GridView indeed comes with a lot of goodies. Developers are freed from the large volume of code that had to be written. Though the look and feel of the GridView is similar to the DataGrid, it is really very different.
In the next section we shall examine the DetailsView which is a complementary to the GridView in several ways.
[catlist id=179].