SQL Server 2005 – Defining Indexes
In this tutorial you will learn about Defining Indexes in SQL Server 2005 – clustered and non clustered indexex, The Query Optimizer, to create an index, To create a unique index, To create a clustered index, To create full-text indexes, To change index properties, To rename an index, to delete an index, To specify a fill factor for an index, To create an XML index and To delete XML Indexes.
When data volumes increase, organizations are faced with problems relating to data retrieval and posting. They feel the need for a mechanism that will increase the speed of data access. An index, like the index of a book, enables the database retrieve and present data to the end user with ease. An index can be defined as a mechanism for providing fast access to table rows and for enforcing constraints.
An index can be created by selecting one or more columns in a table that is being searched. It is a kind of ‘on disk’ structure associated with the table or view and contains keys that are built from one or more of the columns in the table or view. This structure known as B-Tree helps the SQL Server find the row or rows associated with the key values. Indexes can be created on computed columns or xml columns also.
Indexes can be clustered or non clustered. A clustered index stores data rows in the table based on their key values. Each table can have only one clustered index as the key values in the data rows are unique and the index is built on the unique key column. When a table has a clustered index, it is known as a clustered table. Non-Clustered indexes have structures that are different from the data rows. A non clustered index key value is used to point to data rows that contain the key value. This value is known as row locator. The structure of the row locator is determined on the basis of the type of storage of the data pages. If the data page is stored as a heap, a row locator becomes a pointer to a row. If the data page is stored in a clustered table the row locator is a clustered index key. Clustered and Non clustered indexes can be unique and indexes are automatically maintained for a table or view whenever the data table is modified.
SQL Server 2005 permits users add non-key columns to leaf level of the non clustered index for by passing existing index key limits and to execute fully covered index queries.
When the primary key and unique constraints of a table column are defined an automatic index is created.
The Query Optimizer uses indexes to reduce disk I/O operations and use of system resources while querying on data. Queries which contain SELECT, UPDATE or DELETE statements require indexes for optimal performance. When a query is executed, each available method is evaluated for retrieving data and the most efficient one is selected by the Query optimizer. The methodology used may be table scans or index scans. In table scans I/O operations are many and resource intensive as all rows in a table are scanned to find the relevant ones. Index scans are used to search the index key columns to find the storage location of rows needed by the query and as the Index contains very few columns, the query executes faster.
SQL Server 2005 provides the user with a new Transact-SQL DDL statement for modifying relational and XML indexes. The CREATE INDEX statement is enhanced to support XML index syntax, partitioning and the included columns. A number of new index options have been added including the ONLINE option that allows for concurrent user access to underlying data during index operations.
To create an index
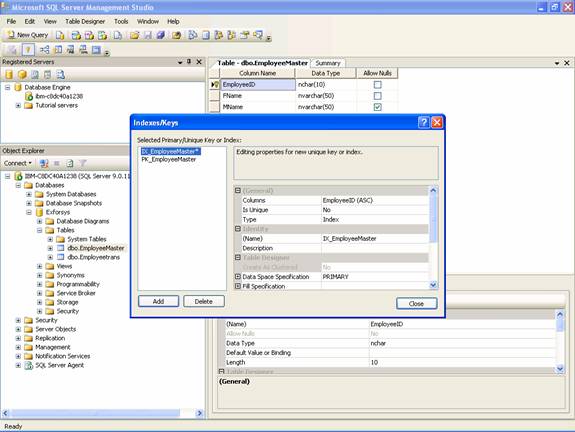
1. In Object Explorer, right-click the table for which you want to create an index and click Modify.
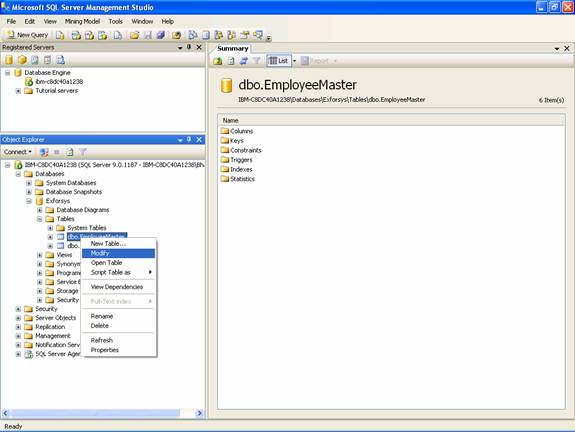
2. The table opens in Table Designer.
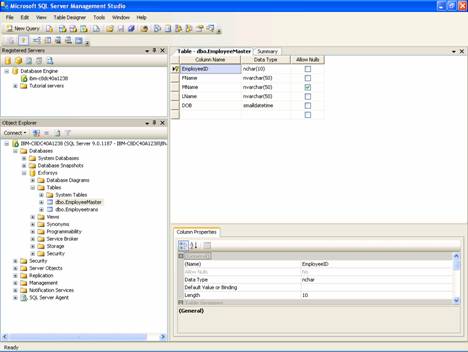
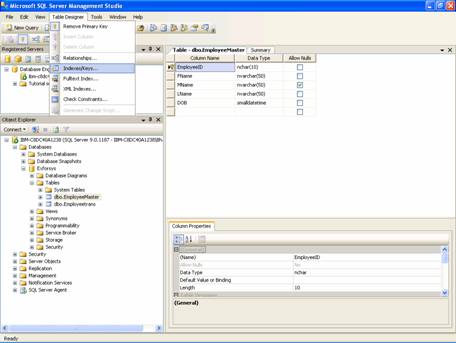
3. From the Table Designer menu, click Indexes/Keys.
4. In the Indexes/Keys dialog box, click Add.
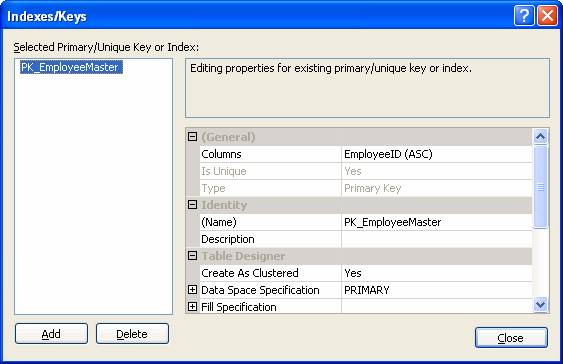
5. Select the new index in the Selected Primary/Unique Key or Index list and set properties for the index in the grid to the right.
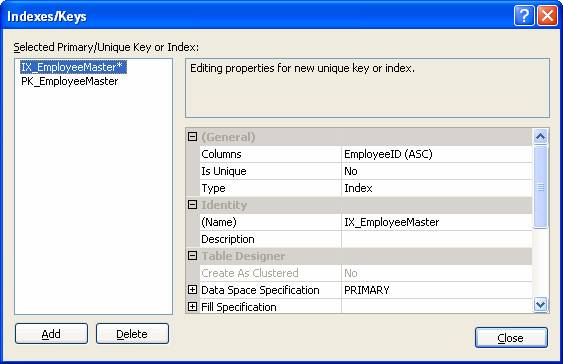
6. Specify any other settings for the index and click Close.
7. The index is created in the database when you save the table.
SQL Server allows users create unique indexes on unique columns such as the identity number of the employee or student or whatever is the unique key by which the component data are identified. A set of columns also can be used to create a unique index. The DBA can set the option of ignoring duplicate keys in a unique index if required. The default is No.
To create a unique index
- In Object Explorer, right-click the table and click Modify.
- The table opens in Table Designer.
- From the Table Designer menu, click Indexes/Keys.
- Click Add. The Selected Primary/Unique Key or Index list displays the system-assigned name of the new index.
5. In the grid, click Type.
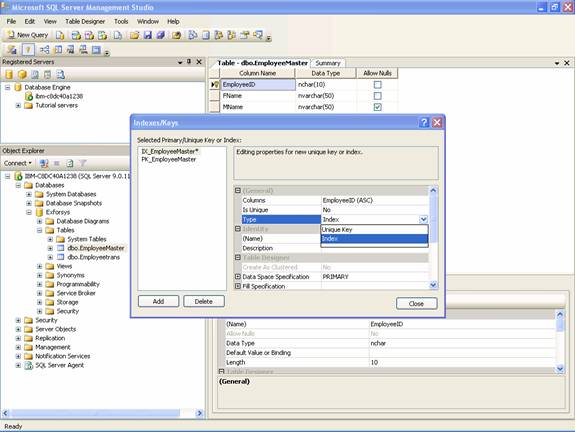
6. Choose Index from the drop-down list to the right of the property.
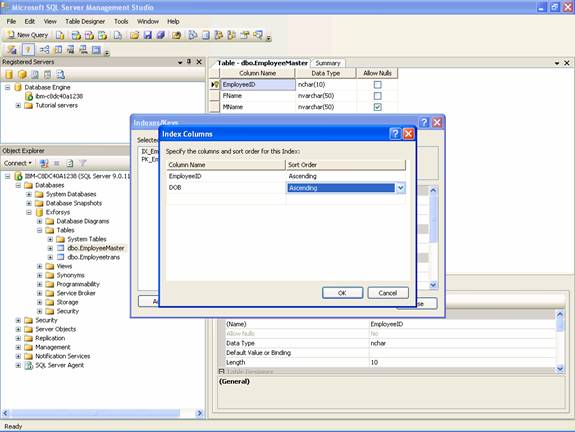
7. Under Column name, select the columns you want to index. You can select up to 16 columns. For optimal performance, select only one or two columns per index. For each column you select, indicate whether the index arranges values of this column in ascending or descending order.
8. In the grid, click Is Unique.
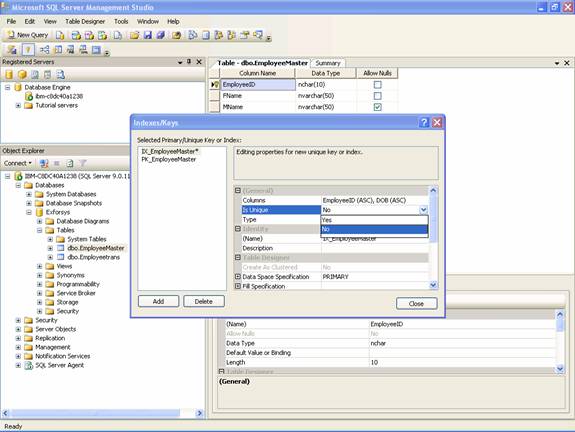
9. Choose Yes from the drop-down list to the right of the property.
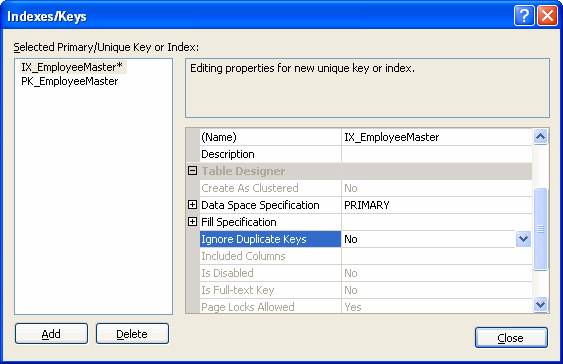
10. Select the Ignore duplicate keys option if you want to ignore new or updated data that would create a duplicate key in the index (with the INSERT or UPDATE statement).
11. The index is created in the database when you save the table or diagram.
Please note that unique indexes cannot be created on a single column if the column contains NULL in more than one row. Similarly indexes cannot be created on multiple columns if the combination of the columns contains NULL in some rows. The NULL values are treated as duplicate values.
Clustered indexes can be created in SQL Server databases. In such cases the logical order of the index key values will be the same as the physical order of rows in the table. A table can have only one clustered index.
To create a clustered index
1. In Object Explorer, right-click the table for which you want to create a clustered index and click Modify.
2. The table opens in Table Designer.
3. From the Table Designer menu, click Indexes/Keys.
4. In the Indexes/Keys dialog box, click Add.
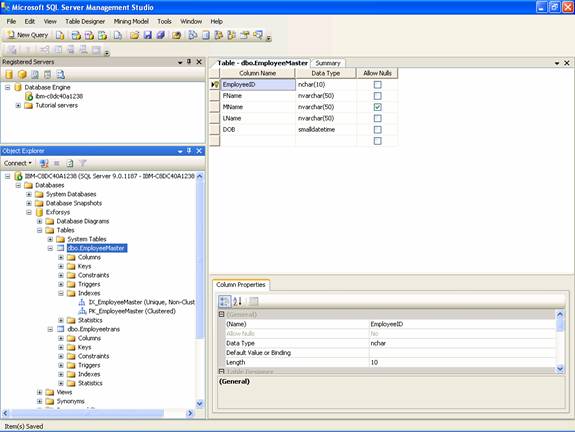
5. Select the new index in the Selected Primary/Unique Key or Index list.
6. In the grid, select Create as Clustered, and choose Yes from the drop-down list to the right of the property.

7. The index is created in the database when you save the table.
A full text index is used when a full text search is required to be performed on all the text based columns of the database. This index relies on a regular index which has to be created before a full text index is created. The regular index is created on a single, non null column. Usually a column with small values is selected for the indexation in a regular index. Often a Catalog is created using an external tool such as SQL Server Management Studio. Textual data from different text file formats are to be stored as image type files before Full text search can be done on the data.
To create full-text indexes
- In Object Explorer, right-click the table for which you want to create a full-text index and click Modify.
- The table opens in Table Designer.
- From the Table Designer menu, click Fulltext Index.

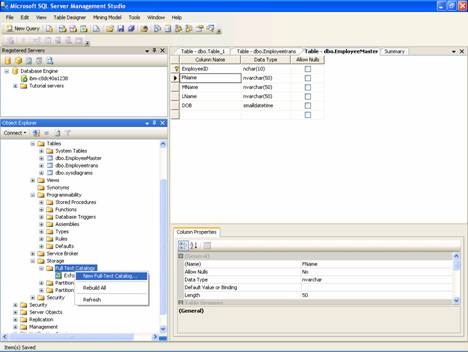
4. The Full-text Index dialog box opens. If the database is not enabled for full text indexing the dialog box will have the add button disabled. To enable full text indexing for the database, right click the database>Click properties and check the Full text indexing check box.

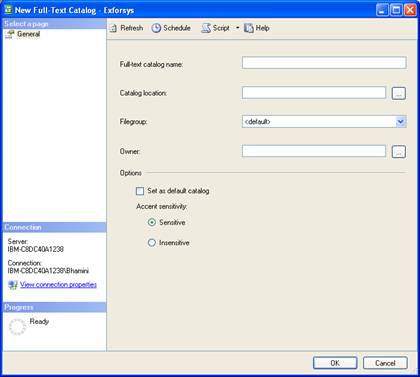
5. Then create a catalog by right clicking on Storage>Full Text Catalog and creating a new Catalog and entering the required information in the dialog box that opens.
6. Now open the Full Text Index property dialog box by clicking on it in the Table Designer menu.
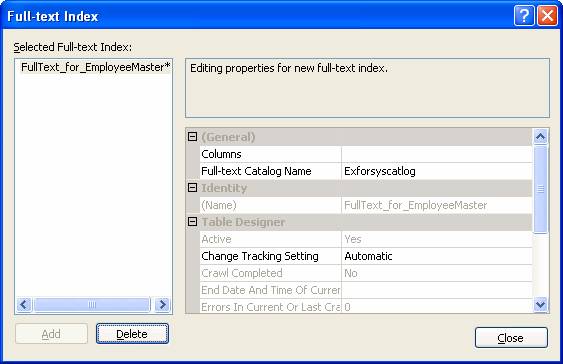
7. Click Add.
8. Select the new index in the Selected Full-text Index list and set properties for the index in the grid to the right.
9. Your index is automatically saved in the database when you save your table in Table Designer. The index is available for modification as soon as you create it.
To change index properties
1. In Object Explorer, right-click the table you want to open and click Modify.
2. From the Table Designer menu, click Indexes/Keys.
3. Select the index from the Selected Primary/Unique Key or Index list.
4. Change properties in the grid.
5. The changes are saved to the database when you save the table.
System defined names are assigned to indexes based on the database file name. If multiple indexes are created on a table the index names are incremented numerically with _1, _2 etc. An index can be renamed to be unique to a table. Since the automatically created index bears the same name as the primary key or unique constraint in a table, another index cannot be renamed later to match the primary key or unique constraint.
To rename an index
1. In Object Explorer, right-click the table with the index you want to rename and click Modify.
2. From the Table Designer menu, click Indexes/Keys.
3. Select the index from the Selected Primary/Unique Key or Index list.
4. In the grid, click Name and type a new name into the text box.

5. The changes are saved to the database when you save the table.
Indexes can be deleted. Usually an index is considered for deletion when the performance of the INSERT,UPDATE and DELETE operations are hindered by the Index.
To delete an index
1. In Object Explorer, right-click the table with indexes you want to delete and click Modify.
2. From the Table Designer menu, click Indexes/Keys.
3. In the Indexes/Keys dialog box, select the index you want to delete.
4. Click Delete.
5. The index is deleted from the database when the table is saved.
6. A similar procedure can be followed for deleting a full text index by selecting Full text index from the Table Designer and selecting the index name and clicking delete button.
Microsoft SQL Server database uses a fill factor to specify how full each index page can be. The percentage of free space allotted to an index is defined as the fill factor. This is an important aspect of indexing as the amount of space to be filled by an index has to be determined by the DBA so that performance is not retarded.
To specify a fill factor for an index
1. In Object Explorer, right-click the table with an index for which you want to specify a fill factor and click Modify.
2. The table opens in Table Designer.
3. From the Table Designer menu, click Indexes/Keys.
4. The Indexes/Keys dialog box opens.
5. Select the index in the Selected Primary/Unique Key or Index list.
6. In the Fill Factor box, type a number from 0 to 100. The value of 100 implies that the index will fill up completely and the storage space required will be minimal. This setting is recommended only for cases where data is unlikely to change. If data is likely to undergo addition and modification, it is better to set a lower value. Storage space required would be in proportion to the value set.
XML indexes cannot be created using the Index/Keys dialog box. One or more XML indexes can be created for xml data type columns on the basis of a primary xml index. Deleting the primary xml index will result in the deletion of all indexes created on the base of the primary index.
To create an XML index
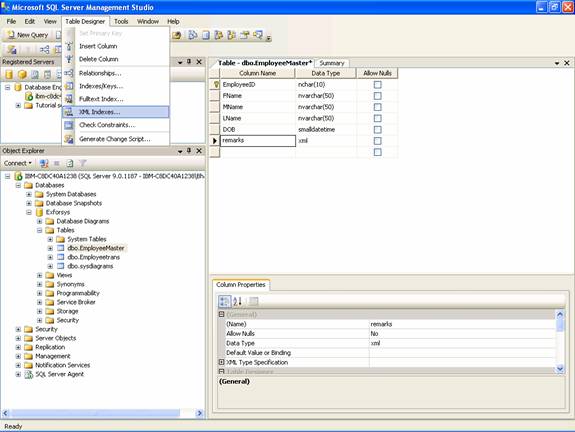
1. In Object Explorer, right-click the table for which you want to create an XML index and click Modify. 2. The table opens in Table Designer.
3. Select the xml column for the index.
4. From the Table Designer menu, click XML Index.
5. In the XML Indexes dialog box, click Add.

6. Select the new index in the Selected XML Index list and set properties for the index in the grid to the right.
To delete XML Indexes
1. In Object Explorer, right-click the table with the XML index you want to delete and click Modify.
2. The table opens in Table Designer.
3. From the Table Designer menu, click XML Index.
4. The XML Index dialog box opens.
5. Click the index you want to delete in the Selected XML Index column.
6. Click Delete.
[catlist id=178].