Working with Legacy Code – COM Components
In this tutorial you will learn to use COM Components, Understand Runtime Callable Wrappers, Type Library Importer (TLBIMP), Using COM Components Directly, Using COM+ Components and Creating Com+ Application.
Using COM Components
Component Object Model (COM) is a language-independent architecture that defines specifications for component interoperability. Each COM component is identified by a globally unique ID (GUID). It is a number that is unique across space and time. Implementation of COM is called ActiveX. COM objects can be compared with .NET components and ActiveX DLLs with Assemblies. This is because .NET components are more object-oriented.
.NET supports COM and ActiveX for backward compatibility. Let us see how this backward compatibility is achieved.
Understanding Runtime Callable Wrappers
Interoperability between COM objects that are run on unmanaged code and the .NET clients that run on managed code require a good deal of plumbing which is provided by the runtime callable wrapper (RCW). The CLR exposes the COM objects through RCW proxy. The RCW is primarily used to marshal calls between a .NET client and a COM object. The runtime creates RCW for each COM object, regardless of the number of references that exist on that object. Any number of managed clients can hold a reference to the COM objects. The runtime maintains a single RCW for each object.
The metadata derived from a type library can be used by the runtime to create both the COM object being called and a wrapper for that object. Thus each RCW maintains a cache of interface pointers on the COM object it wraps and releases its reference on the COM object when the RCW is no longer needed. So the RCW performs the garbage collection also.
We have already seen that RCW marshals’ data between managed and unmanaged code, on behalf of objects wrapped. It is particularly useful as the RCW marshals methods and method return values whenever the client and server have different representations of the data passed between them.
The wrapper enforces built-in marshaling rules. Thus it streamlines the communication between the server and client.
Using TLBIMP
The Type Library Importer converts the type definitions found within a COM type library into equivalent definitions in a CLR assembly. The TLBIMP.exe gives an output that is a binary file that contains runtime metadata for the types defined within original type library. The usage of the tool is given below:
Tlbimp tlbfile [options]
This file can be examined with Ildasm.exe
Some of the options that are used with TLBIMP are given below:
|
Option |
Description |
|
/asmversion:versionNumber |
Specifies the version number of the assembly to produce. Specify versionNumber in the format major.minor.build.revision. |
|
/delaysign |
Specifies to Tlbimp.exe to sign the resulting assembly with a strong name using delayed signing. |
|
/help |
Displays command syntax and options for the tool |
|
/keycontainer:containername |
Signs the resulting assembly with a strong name using the public/private key pair found in the key container specified by containername. |
|
/keyfile:filename |
Signs the resulting assembly with a strong name using the publisher’s official public/private key pair found in filename. |
|
/namespace:namespace |
Specifies the namespace in which to produce the assembly. |
|
/noclassmembers |
Prevents Tlbimp.exe from adding members to classes. |
|
/nologo |
Suppresses the Microsoft startup banner display. |
|
/out:filename |
Specifies the name of the output file, assembly, and namespace in which to write the metadata definitions. |
|
/primary |
Produces a primary interop assembly for the specified type library. |
|
/publickey:filename |
Specifies the file containing the public key to use to sign the resulting assembly. |
|
/reference:filename |
Specifies the assembly file to use to resolve references to types defined outside the current type library |
|
/silent |
Suppresses the display of success messages. |
|
/strictref |
Does not import a type library if the tool cannot resolve all references within the current assembly, the assemblies specified with the /reference option, or registered primary interop assemblies (PIAs). |
|
/strictref:nopia |
Same as /strictref, but ignores PIAs. |
|
/sysarray |
Specifies to the tool to import a COM style SafeArray as a managed |
|
/tlbreference:filename |
Specifies the type library file to use to resolve type library references without consulting the registry. |
|
/transform:transformName |
Transforms metadata as specified by the transformName parameter. |
|
/unsafe |
Produces interfaces without .NET Framework security checks. Calling a method that is exposed in this way might pose a security risk. You should not use this option unless you are aware of the risks of exposing such code. |
|
/verbose |
Specifies verbose mode; displays additional information about the imported type library. |
|
/? |
Displays command syntax and options for the tool. |
Tlbimp.exe performs conversion on an entire type library collectively. Tlbimp.exe also has options for supplying the information necessary to generate strongly named assemblies. A resource ID can also be appended to a type library file when importing from a module containing multiple type libraries. Tlbimp.exe is able to locate this file if it is in the current directory or if you specify the full path.
{mospagebreak}
.
.
.
Using COM Components Directly
A COM component can be used in a .NET application by adding a reference to the project. In such situations, metadata is created from the type library of the component that is being referenced. When the object is instantiated in the .NET application, it is treated as any other .NET class library. The code acts and looks the same. Underneath the CLR is creating the RCW for the COM object and the COM object itself is marshaling calls back and forth between the managed and unmanaged process.
The ActiveX component which may be a .dll file will have to be registered with the Regsvr32.exe command. In the solution explorer of the project that is being used, reference to the .dll file will have to be added.
This component can be consumed like any other .NET component. However DLL created cannot be placed in a Global Assembly Cache and hence it cannot be reused.
Using COM+ Components
Developing components using COM specifications are of prime importance in COM+. COM+ enhances and upgrades the MTS services viz., Transaction Services, Security Services, and Synchronization Services: This also helps us develop simple development environment for Server Components. With COM+ user’s can:
1. Design single-user, single threaded components
2. Incorporates threading, concurrency, process management, and deployment.
3. Easily deploy your application as an n-tier application
4. Install the components by dragging and dropping
The various COM+ Services and the description are given below:
|
COM+ Services |
Description |
|
Resources Management |
Manages resources such as database connection, network connection, and memory |
|
Just-in-Time Activation |
Conserves Server memory |
|
Role-Based security |
Validates security permissions based on roles |
|
Concurrency |
Enables multiple processes to run simultaneously |
|
Object pooling |
Provides a pool of readymade objects |
|
Automatic Transaction management |
Enables you to configure classes at the design stage, which take part in the transaction at run time |
|
Queued components |
Provides asynchronous message queuing |
|
COM+ Events |
Stores event information from different publishers |
|
Shared property manager |
Shares state among multiple objects within a server process |
|
Compensating resource manager |
Applies atomicity and durability properties to non-transactional resources |
In visual studio create a new class project and add the following code to the class.
Imports System
Namespace ComPlusDemo
.
Public Class Class1
…….Public Sub check(ByVal years As Integer)
…………..If years > 10 Then
…………………Console.WriteLine("Additional Incentive Payable!")
…………..Else
…………………Console.WriteLine("No Incentive payable!")
…………..End If
…….End Sub
End Class
End Namespace
After finishing this click the menu build and build the solution. The message Build Succeeded appears in the status bar. The class1 is created a component that accepts the number of years as an argument and returns a message so say if incentive is payable or not.
Now create a new VB project and select console application. Here we reference the class that was just created by right-clicking on the solution explorer and choosing the option Add Reference. In the module that is created add the following code.
Imports ComPlusDemo.ComPlusDemo
Namespace UseComp
…..Module Module1
…..
……….Sub Main()
……………‘ Uncomment the following line to set My.User to the currently logged on Windows user.
……………‘ My.User.InitializeWithWindowsUser
.
……………Dim years As Integer
……………Dim exp As String
……………Dim Eligibility As New Class1()
…..
……………Console.WriteLine("Enter the number of years!")
……………exp = Console.ReadLine()
……………years = Convert.ToInt16(exp)
……………Eligibility.check(years)
……………Console.ReadLine()
……….End Sub
…..
…..End Module
End Namespace
Now press F5 to execute the module, the result is shown below:
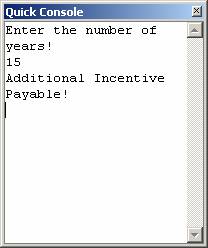
This demo shows the creation of .NET desktop console using components.
Creating Com+ Application:
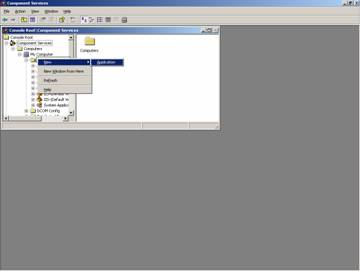
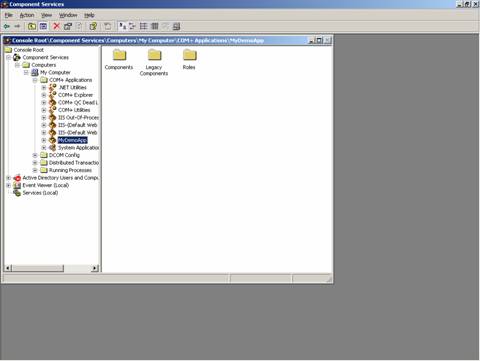
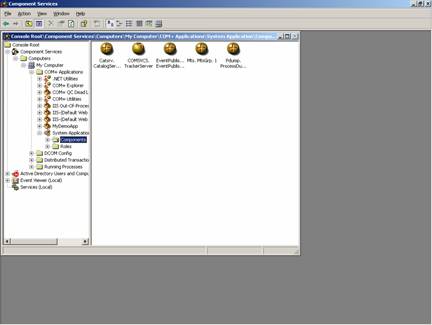
From the Administrative tools choose component services. The component services window opens. Expand component services and MyComputer. Right click on the Com+ Application and choose new application as shown in the screenshot below:
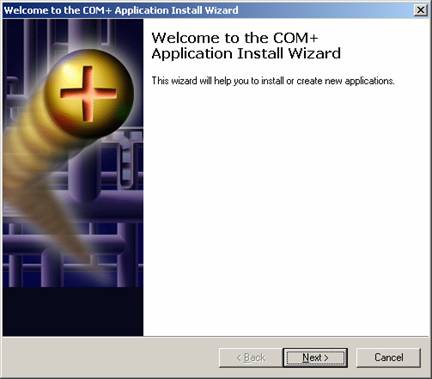
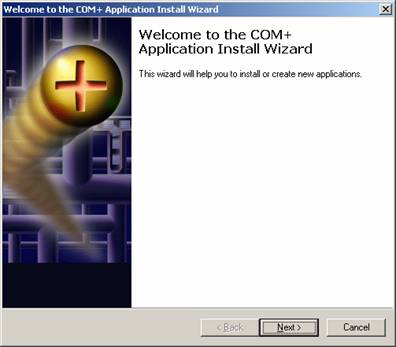
This starts the wizard the first screen of which is shown below:
{mospagebreak}
.
.
.
Click next to continue. In the next screen, “Install or create a new application” choose “Create an empty application”. In the next screen give a name for the application and choose the type of application as server application as shown below:
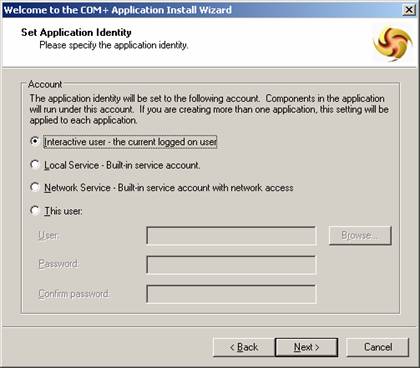
The following screen appears as the next stage. If this user is chosen then username and password has to be given.

An empty project has been created successfully. This can be registered as a component by following the sequence of the wizard.
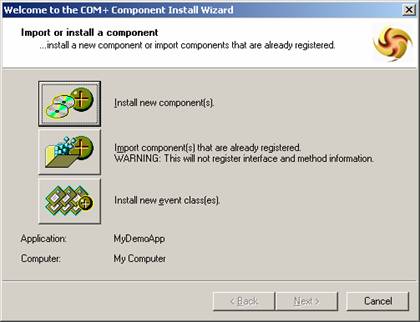
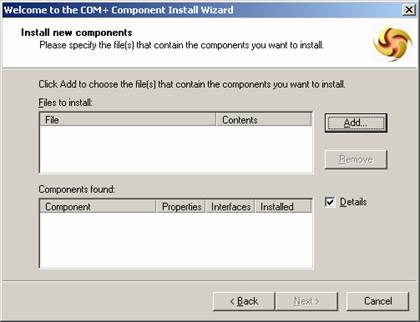
The components can be manually registered using the tool Regsvcs.exe. Components can also be registered dynamically. These components can be used by COM+ services to provide additional functionality.<
[catlist id=175].